Showing posts with label tutorial. Show all posts

Wednesday, March 13, 2013

notes on macramé


Macramé! It's so hot right now and after many requests from the Brisbane brown owls members I pulled out the rope and string and all sorts of yarn-y bits and went through the motions again for our meet up.

Macramé owl from last year - make your own here

Last year it was all guns blazing with the macramé meet up and we tackled the owl! Appropriate? Yes! Easy? Not for those who had never tackled the square knot.

This year I thought it best to ease into the idea of working with a bunch of string, where the knots should go for a nice 'net' pattern and how it all comes together. So, firstly we went for it with the knotted plant holder which everyone pulled off very quickly and easily, country boy even used his recycled t-shirt yarn from last year's meet up to make one - oh so eco!

"Yay! It's so easy! We're going to fill up our homes with these!"

They are so easy and fun to make. For more info check out this video on Etsy but more importantly have a look at the pdf in the actual article itself as it's much easier to follow. The first one I made with 6mm rope for Kevin our uber fern to hang in but I had to double all of the measurements to get the length I wanted and also because the rope was thicker the knots take up more room. There's also a great tutorial on skinny laminx! You can make them for smaller plants with twine or yarn but if you're using them outdoors it's probably best to go for a hemp twine rather than jute which may deteriorate over time.

Kevin

After Kevin was feeling light and airy and fabulous I moved on to jars because we obviously eat too many olives and have a ridiculous amount of jars. The jars are great for storing little collections of treasures, popping a tea light into (LED only - be careful of flames near the macramé!) or more recently I've used them for plant cuttings and as vases. I love them!

made with basic twine and 4mm crochet cotton

In my macramé research travels I also came across this fab tutorial which really shines a light on how knotting twine around jars or bottles gives a beautiful nautical effect.


Then it was time to move on to the square knot. Despite the fact that I was a Girl Guide I was feeling a little concerned about dredging it back from my memories but it's super easy and images like this are a great help!

image from here


Here are the instructions I used at our meet up, I hope they'll be helpful for you too!

How to tie a square knot

1. Knot four pieces of string (or whatever you're using) together. The two pieces of string on the outside will be the pieces you're working with. The two in the middle will form the centre or core that you'll be knotting on.

2. Bring the left piece of string (the red one in the picture above) over the two centre strings. Then bring the right piece of string (the maroon or dark brown one in the picture above) over the left string, under the two centre strings and through the loop that is formed by the left string. Pull the left and right strings until they tighten.

3. Ok, then you're basicially doing the opposite. Bring the right piece of string (the red one in the picture above) over the two centre strings. Then bring the left piece of string (the maroon or dark brown one in the picture above) over the right string, under the two centre strings and through the loop that is formed by the right string. Pull the left and right strings until they tighten.

That's it, you have a square knot! If you want to add a bead you can slide it onto the two centre strings and keep knotting. 


Now that the square knot is mastered you can make up your own macramé fabulousness. You can even do the twisty thing by only completing step 2 above over and over till you get a nice length of twistiness.  You can make jewellery, more elaborate plant hangers, wall hangings, market bags, the ideas are endless! And you can use all different materials!

For more ideas and inspiration I have a little Pinterest board all about macramé which I'll keep adding to here.

If you have any tips, hints or links to your own macramé I would love to hear from you in the comments section below :)

Happy knotting!

Rebecca x


Friday, October 19, 2012

embroidered cards: how to and pics from the archive


Digging up some pics from my crafty past (2008) for the next Brown Owls meet up on embroidered cards. Don't you just love re-visiting the old days when it was all about experimenting with every possible craft you could think of till you found 'the one'!

These are super easy to make and sweet for Christmas, just to prove it here's some links to some great tutorials:

Mr Handsomeface: Neon Embroidered Card
Design Sponge: Hand-embroidered note cards
Next to Nicx: Constructive chaos

If you make some let me know, I'd love to check them out :)

Wednesday, October 10, 2012

paper garland love


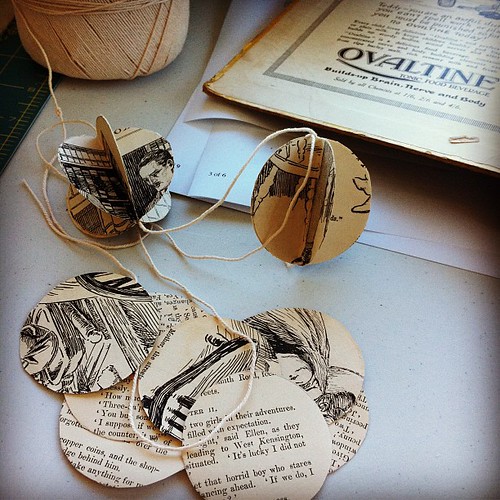
One of the many things I love about Brown Owls is taking the time out to explore a craft I've never really dabbled in before. It's great for the creative bits of my brain to take a break from stitching and learn something new. Last month we had a fab meet up making paper garlands, the one above that I'm still finding bits of time to work on, (check out the tutorial here) was my favourite, it's quick and simple and will look super cute for my market stall display. Plus you could use any shape to make them, hearts, snowflakes, clouds, the world is your oyster!

There's so many possibilities for paper garlands especially when you venture into the world of origami, here are a few of my favourites. 


Guusje Appeltaart's MYO Rocket Garland Tutorial is so cute and I love that it combines handmade stamps (more on those soon) with paper craft. 


Origami garlands always look really effective, I love these little stars from Currently Coveting but what I love even more is the way she cleverly uses an ombre dying effect to create gorgeous hues of blue. 


Simple shapes in bold colours look equally fab, a little cutting and stitching and voila! I really love these garlands made by Weekday Carnival.


Hanging strings of paper flowers or leaves make a gorgeous back drop, these pom pom vines are so adorable hanging on trees.


And I love the use of an old branch for this backdrop, tutorial and flower template can be found at ellinée journal. Flagging this one for my little sister's wedding :)

And another great thing about paper garlands, it's an awesome way to use up paper scraps or recycle old magazines, damaged books, junk mail and newspapers, everyone wins! :)

Tuesday, June 26, 2012

granny squares

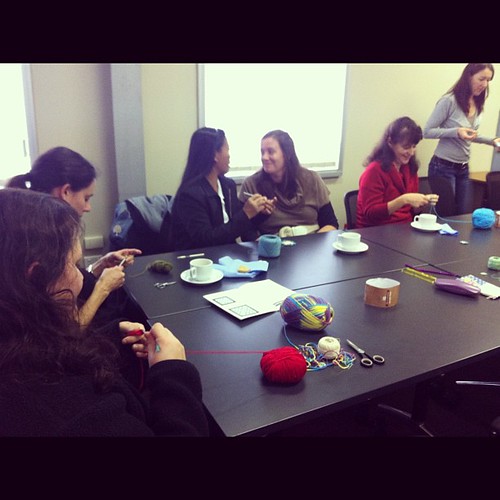
Another group of granny squarists ready to take on the world after Brown Owls this morning, hoot!

After a fabulous granny square session at Brown Owls last weekend I thought I'd share some granny square goodness I came across on my travels.


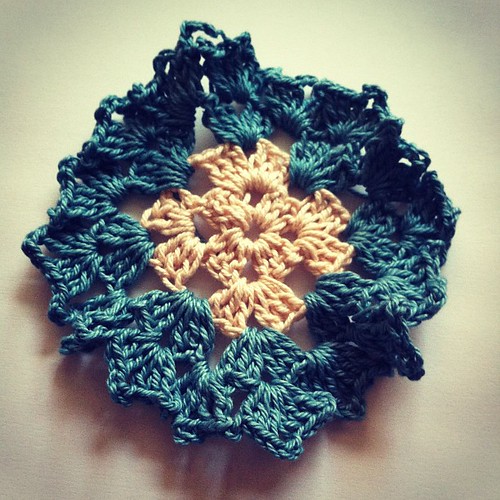
  Granny square flowery coaster one of the Owls made today, cute! 
And this sweet little flowery granny square coaster was made at the Brown Owls meet up and gifted to me by Needa, hehe :)

If you're in Brisbane and you want to learn to granny get on the Brown Owls craft group mailing list.
(There's loads of other Brown Owls chapters in all parts of the world too!)

Happy Grannying! 

Wednesday, November 23, 2011

gettin' crafty: more fun diy projects


Everything you need to know about using bleach pens to design your own fabric or to pretty up already existing linen, clothing, anything.


I'm totally in love with the pants bowl, just waiting around for my pants to get holes in them so I can whip up some of these!


The DIY Globe Garland from Poppytalk has made it to my little Brown Owls Project Options list over at Pinterest as the perfect paper craft project.


Hopefully we can get someone fabulous to run a Brown Owls screen printing craft along project for 2012 but if not there's always this fab tutorial to fall back on.


And a shower cap to pop on over all those super delicious Summer salads? Yes please! Check out Allyson Hill's eco travel lid, they'd make perfect stocking stuffers too.

Monday, November 21, 2011

5 crafty diy projects for summer


I'm really looking forward to the Christmas break when (fingers and toes) I will have a little time to do the type of crafting that's just for me, oh and preparing the type of crafting that's just for 2012 Brisbane Brown Owls ;)

I'm planning on spending a lot of time with the ocean over my break so Resurrection Fern's little urchin crochet covered sea stone tutorial for The Purl Bee above is perfect beach crafting :)


The cutest softie-making project: Jodie's turtles on whipup, they're so sweet and look so easy (and earth-friendly if you make them with eco felt!!)


Got a hula hoop? And some old t-shirts? My little and somewhat bare unit could definitely do with one of these hula hoop rugs but could I do without my hula hoop while making it?


Sweetest paper craft project for origami lovers, I'd opt for some colourful old magazines or junk mail making these Japanese Kusudama flowers.


And for some Summer fun I love these jersey knit bracelets by V and Co. I imagine you could whip up some pretty cool ones with old t-shirts too.

That's five crafty projects I love and if you're on Pinterest or Twitter you can watch my little list grow. Check out the Brown Owls Project Options Pinterest Board or follow me on Twitter.

Got a favourite crafty diy? Leave me a comment, I'd love to check it out :)

Tuesday, October 11, 2011

eighth day of the week :: make your own tea bags


I really love fresh loose leaf tea especially since I've recently taken a break from my beloved coffee, in fact I'm sipping on the most delicious olive leaf and green tea as I type so when I spied this make your own tea bag tutorial I knew it had to go on my list of crafty goodness for when I'm granted my eighth day of the week.

I can think of so many good reasons for making your own tea bags, they'd make the sweetest gifts, they'd be especially cute popped in the post with Christmas cards, or in a package as a little additional handmade thank you to all the lovely Etsy shoppers out there. How nice would it be to have a handy stash of freshly blended tea bags when you're on the trot or to have a tea bag making morning tea, the possibilities are endless ;)

Plus there's loads of teas to choose from for your tea bags, here's a few that caught my eye...


All you need to know to get bagging is in these fab links:
A Beautiful Mess :: Loose leaf tea? Make your own tea bags!
Lillyella :: Tea Bags for gifts and favors (a more eco friendly version)
Crafting with Recyclables :: Tea bag notecard and envelope
Tea Wallet Tutorial very cute idea for carting your tea bags around in.

What do you think? Are you going to have a crack at it? If you do, leave me a little comment, I'd love to know how you go. And if you don't have time now you can always pop back later for all the links ;)

Happy sipping!

Sunday, September 4, 2011

eighth day of the week :: granny ripple crochet tutorial


If I were miraculously granted an eighth day to this week I'd use The Lazyhobbyhopper's granny ripple tutorial and make something fabulous. I can already granny square so I reckon it'd be pretty easy to follow. 

The only problem being that when my eighth day comes to an end it could quite possibly end up on the pile of half finished crochet in the corner of my sewing room... 

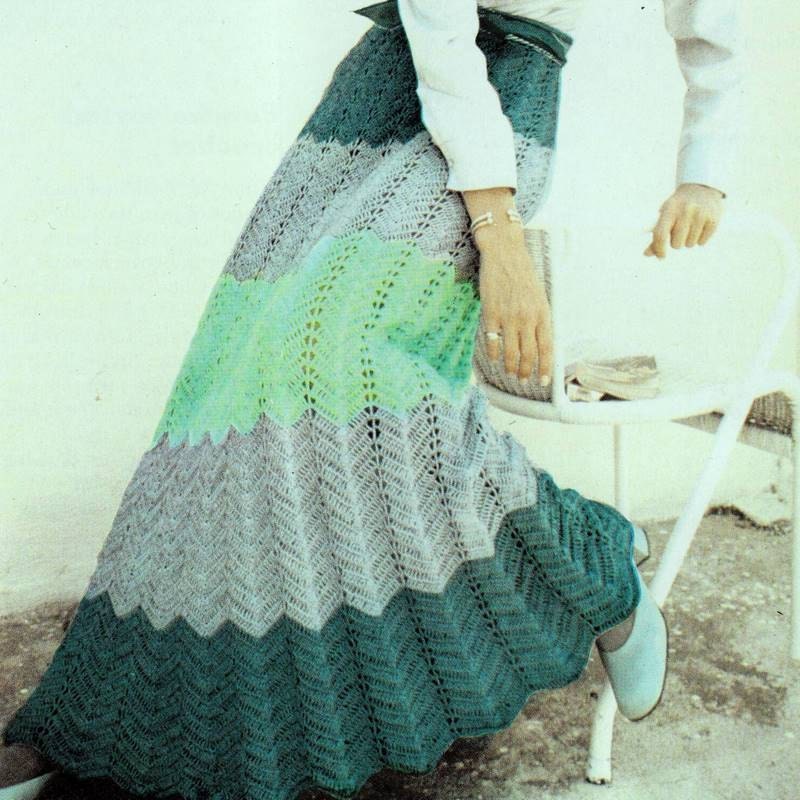
But maybe you'd like to have a crack at it? Here's some ripple inspiration to get you in the mood.


And here's a few more tutorials and patterns you might like:

If you know of any other crochet ripple-y yumminess or have been working on some of your own let us know in a comment below.

Tuesday, March 30, 2010

recycled packaging


I'm always trying to work out more sustainable ways to package parcels so I love this tutorial over on A Beautiful Mess for recycled kraft packaging.


At the moment I'm using recycled envelopes from Scribble Shop, Flight Industries and Chicuff for my smaller items and I'll definitely be aiming to make my own recycled packaging for larger items. It may take a little longer but it will be so worth it. Don't you just love receiving special mail!

The little bookmarks on the package above have been going out with more recent purchases, they're made from recycled scraps of paper and card, mostly old gallery invitations. What do you think? Is the bookmark better than a business card?

Thursday, April 30, 2009

A Plush Car


This little car is heading over the ditch (no, not the sort of ditch that would cause a crash, the ditch between Australia and NZ).

Making this was supposed to be one of those mindless activities, you know the one where you do a search on google for 'free plush car pattern' or 'car softie tutorial' and then whip one up in a night....

Do you think I could find a pattern or tutorial for a car softie? No! Where are they all? Are they hiding? Is there a car softie site out there with really bad metadata that doesn't come up in a search engine? I mean, there must be a million stuffed cars out there, right? Have you seen any?

After a number of wasted internet hours I drafted my own pattern. Clearly it needs a whole lotta work but I do plan on developing it a little more, so if you or I haven't come across a car softie pattern or tutorial online by the time I've developed one, then I'll upload it here. How does that sound?