Thursday, March 28, 2013

my creative space

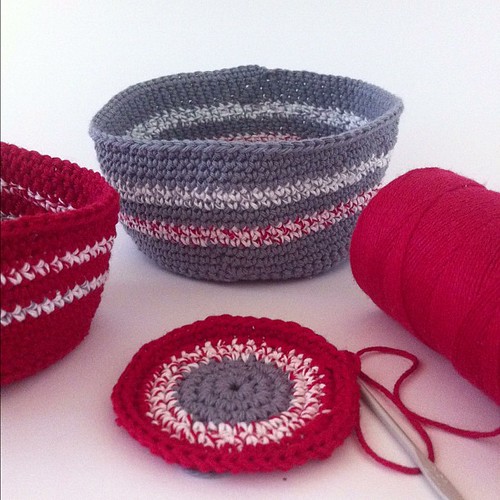
Almost finished my little nesting bowls 

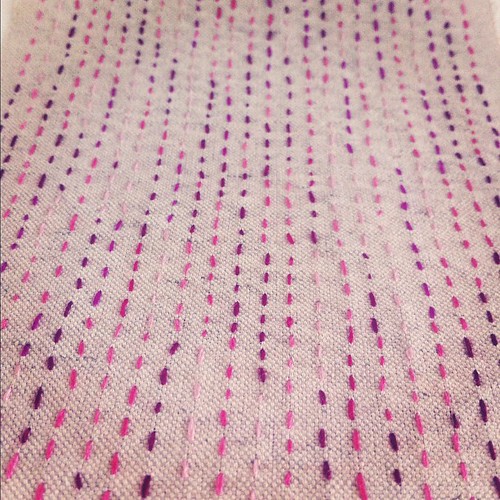
A bit of crochet on the go finishing off these little nesting bowls and more stitching, this time in tones of pink :)

In the coming week I'm hoping to start on some rag rug making, hints and tips very welcome!

What's happening in your space this week? I hope you've posted it here where I'm headed to check out some more crafty goodness :)

Monday, March 25, 2013

new work


A few new treats inspired by the tiny kantha style of stitching I experienced on a recent trip to India. I love the contrast of these colours on linen. It's such a nice departure for me to stitch in this style and I'm looking forward to more needle and thread experiments to come :)

Three brooches in the shop, more goodies coming soon!

Friday, March 22, 2013

saviours of the lost arts

cute pencil brooches Jetta's Nest

Saviours of the Lost Arts is back again which is pretty exciting and will be run by the fab team at BrisStyle. There's so many awesome things to book in to, you should check it out here!

Brown Owls at Mt Coot-tha Library on Sunday

Brown Owls will be a big part of it and I'll be running some meet ups from April to June where you can learn lots of fun stuff like:

crocheting in the round
granny squares
knitting
rag rugs
fabric brooches
basket weaving with fabric
rubber stamp making
recycled t-shirt crafts
crochet edges

and a few more are in the pipeline!

If you're not in Brisbane I'll do a run down on each of the crafts right here on the blog plus there'll be loads of work in progress shots while I'm developing each of the meet ups, some hints, tips and links for each one too!

More info here:
Saviours of the Lost Arts program
Brisbane Brown Owls info and 2013 dates
Brisbane Brown Owls Facebook page

See you there!
Rebecca x


Thursday, March 21, 2013

my creative space


It's all about hooking and stitching this week (hehe, as usual!) This project is a bit of an indulgence for my little home, I'm aiming for this crochet mandala to get big enough to be used as a cushion cover. The colour palette is clearly inspired by the piece in my home I'm most fixated by, my "Queenie" (this is a detail of it only). It was love at first sight up at Lockhart River last year between me and the beautiful rivers, flowers and pebbles in this painting.


Finishing off these little beach pebbles I collected over the Christmas break for crochet in the round at Brown Owls next month.


And more stitching, little sneak peeks of some new pieces I hope to have finished by this time next week!


What's happening in your space this week? I hope you've posted it here where I'm headed to check out some more crafty goodness :)

Tuesday, March 19, 2013

hello bloglovin'


Thank you Birdy!

Not much more to say except that Google Reader is over (sob for one second) and bloglovin' is even better anyway for collecting and reading all the blogosphere goodness.

So now you can Follow my blog with Bloglovin and there's also a very nice app which will make it even easier to catch up with everyone else :)

Oh sorry Birdy! For those of you who haven't met Birdy previously on instagram she was created one crafternoon with my family. My nieces, my sister, my Mum and me all made a little bit of her and now she lives in a gorgeous little town called Pottsville :)


Friday, March 15, 2013

still nesting


So many talented creative people making so many beautiful things that should be in my home :)

1. Avocado shaped fibre form : Robyn, fibreartist44
2. Hemp/organic cotton tea towel : jenna rose handmade
3. The amazing collaboration between Paravent and Ouchflower - yes it's available to buy and totally affordable!
4. Beautiful clay picture with natural heath imprint : herbs and nature
5. Love these three old wooden spoons from India soooo much!! : delfin design

If only I had more wall space, display space and shelving! For now they'll have to live in my virtual home :)

Thursday, March 14, 2013

my creative space


I've been indulging in a little bit of crochet this past week. I always have issues with storage so I've been working on perfecting my crocheting-in-the-round skills to make some bowls and baskets for my home. Learning that while it's very tempting to double crochet, it's actually better to single crochet the sides of a bowl or basket so it stands upright nicely. Yep, trial and error!


Having recently been inspired by my little trip to India I'm also enjoying a bit of kantha style stitching, well my own version of it really. Kind of reminds me of sashiko as well. Either way it makes for a nice departure from my usual whipped stitch and it's highly addictive!

Plus I've been pulling together all of my macramé notes and links from the last Brown Owls meet up, you can find them here, great for anyone wanting an easy way in to knotting.

And with that it's time to make a cuppa and check out more spaces here :)

Wednesday, March 13, 2013

notes on macramé


Macramé! It's so hot right now and after many requests from the Brisbane brown owls members I pulled out the rope and string and all sorts of yarn-y bits and went through the motions again for our meet up.

Macramé owl from last year - make your own here

Last year it was all guns blazing with the macramé meet up and we tackled the owl! Appropriate? Yes! Easy? Not for those who had never tackled the square knot.

This year I thought it best to ease into the idea of working with a bunch of string, where the knots should go for a nice 'net' pattern and how it all comes together. So, firstly we went for it with the knotted plant holder which everyone pulled off very quickly and easily, country boy even used his recycled t-shirt yarn from last year's meet up to make one - oh so eco!

"Yay! It's so easy! We're going to fill up our homes with these!"

They are so easy and fun to make. For more info check out this video on Etsy but more importantly have a look at the pdf in the actual article itself as it's much easier to follow. The first one I made with 6mm rope for Kevin our uber fern to hang in but I had to double all of the measurements to get the length I wanted and also because the rope was thicker the knots take up more room. There's also a great tutorial on skinny laminx! You can make them for smaller plants with twine or yarn but if you're using them outdoors it's probably best to go for a hemp twine rather than jute which may deteriorate over time.

Kevin

After Kevin was feeling light and airy and fabulous I moved on to jars because we obviously eat too many olives and have a ridiculous amount of jars. The jars are great for storing little collections of treasures, popping a tea light into (LED only - be careful of flames near the macramé!) or more recently I've used them for plant cuttings and as vases. I love them!

made with basic twine and 4mm crochet cotton

In my macramé research travels I also came across this fab tutorial which really shines a light on how knotting twine around jars or bottles gives a beautiful nautical effect.


Then it was time to move on to the square knot. Despite the fact that I was a Girl Guide I was feeling a little concerned about dredging it back from my memories but it's super easy and images like this are a great help!

image from here


Here are the instructions I used at our meet up, I hope they'll be helpful for you too!

How to tie a square knot

1. Knot four pieces of string (or whatever you're using) together. The two pieces of string on the outside will be the pieces you're working with. The two in the middle will form the centre or core that you'll be knotting on.

2. Bring the left piece of string (the red one in the picture above) over the two centre strings. Then bring the right piece of string (the maroon or dark brown one in the picture above) over the left string, under the two centre strings and through the loop that is formed by the left string. Pull the left and right strings until they tighten.

3. Ok, then you're basicially doing the opposite. Bring the right piece of string (the red one in the picture above) over the two centre strings. Then bring the left piece of string (the maroon or dark brown one in the picture above) over the right string, under the two centre strings and through the loop that is formed by the right string. Pull the left and right strings until they tighten.

That's it, you have a square knot! If you want to add a bead you can slide it onto the two centre strings and keep knotting. 


Now that the square knot is mastered you can make up your own macramé fabulousness. You can even do the twisty thing by only completing step 2 above over and over till you get a nice length of twistiness.  You can make jewellery, more elaborate plant hangers, wall hangings, market bags, the ideas are endless! And you can use all different materials!

For more ideas and inspiration I have a little Pinterest board all about macramé which I'll keep adding to here.

If you have any tips, hints or links to your own macramé I would love to hear from you in the comments section below :)

Happy knotting!

Rebecca x


Thursday, March 7, 2013

my creative space


Less actual making and more tying up loose old ends and sketching new ideas this week. As always I'm still managing to squeeze in a bit of 'necessary-to-keep-me-sane' stitching and hooking :)


Loose old ends in the form of too many unfinished projects lying around the house...


And too much unlisted stock! I'm getting there though :)

For more spaces head over here.


Wednesday, March 6, 2013

shop update


I'm working on getting all of my stock into the shop, the whole wanting to make new products process is incredibly distracting though. I wish photographing and listing was as much fun as making...

 All new brooches are listed


A new version of the little bird that's always a hit at markets

And my most favourite pencil case
Check out the back, it's ridiculously cute and one of a kind! 

There's lots more coming very soon!